How to Make Toffee: A Comprehensive Guide

When I first set out to make my own toffee, I heard through the grapevine that toffee recipes look easy but that there is actually an infinite number of things that could go wrong and ruin a batch. Unlike cookies or soup, it’s pretty impossible to rescue ruined toffee once it passes a certain threshold, resulting in a very large amount of wasted butter and sugar.

I did a lot of research and compiled a list of all the techniques that increases your likelihood of success. My first batch came out perfect! For my second batch, I got cocky, doubled the recipe, and lost the whole lot. I learned a lot along the way, and now I can pass those lessons on to you.
This is a comprehensive guide to how to guarantee that your toffee turns out amazing on the first try. I recommend reading the whole article through first before setting out to make your toffee.

Step 1: Prepare Your Equipment

YOU NEED A CANDY THERMOMETER. This is not negotiable. You can buy these for $10-20 on Amazon or in a store that sells cooking gear. You don’t need anything fancy. You just need something that accurately takes the temperature of your food.

When you get your candy thermometer, test it to make sure it is accurate. Here’s how you do that:
At sea level, water boils at 212 degrees F, but with each 500-feet increase in elevation, the boiling point of water decreases by about 1 °F. You want to find out at which temperature water boils at your elevation. This question seems complicated but you only have to figure out this information once!

Google the name of your city and elevation. Google should list an easy to find number at the top of the page. Then check out this chart to see what temperature water boils at that elevation.

Once you have your number, fill a pot with water and put your thermometer in the water. Bring the water up to a boil and carefully watch what temperature your thermometer reads when the water reaches a full boil. Make sure you are looking at the thermometer straight on. It should reach a boil right at the temperature you determined earlier.

If your water boils a few degrees below or above when expected, make a note of that. With just a few degrees of difference, you can usually add or subtract that number to the magic temperature that candy is created and be fine. If it’s 10 degrees off or more, return that candy thermometer and get a new one.

Make sure to do this test each and every time you make candy.

TIP: Make a note of how much of a difference there is between the temperature your water boils and 212 degrees. You’ll also want this information later when you’re making the candy. For example, if water boils at 211 degrees where you are, your candy will be ready at 297 degrees instead of the standard 298 degrees.

Other special equipment you will need:

  • A heavy bottom pot that is the same size or smaller than your most reliable burner
  • A non-metal heat safe spoon
  • 2-3 baking sheets, preferably rimmed
  • Parchment paper or silicone baking mats (I use Silpat mats and they’re amazing)
  • A heat-safe spatula
  • A pastry brush

Note: You’ll want your heavy bottom pot to be a minimum of 2 qts for this recipe. My 2 qt pot is JUST BARELY big enough, and I’m scared it’s going to overflow when it bubbles up every time. When the bubbles reach the top, I focus on stirring around the edges to pop the bubbles for a couple minutes until enough water evaporates and the level of liquid lowers.

Step Two: Weigh Your Ingredients

Measuring your ingredients by weight will ensure the recipe is as accurate as possible. It’s pretty frequent that 1 lb of butter is actually 1 lb only when including packaging, and you’ll lose 0.15oz by unwrapping it.

Ingredients:

  • 16 oz butter (chopped into cubes)
  • 16 oz white sugar
  • 3 oz warm water
  • 1 tsp salt
  • 1 tsp vanilla extract
  • Toppings of your choice (toasted almonds, crushed peppermint candy, sea salt, etc)
  • 12 oz dark chocolate

This recipe makes around 2 lbs of toffee which is PLENTY to give out to friends with enough left over to keep for yourself. I don’t recommend doubling this recipe, because the longer it takes for toffee to cook, the more likely it will burn or separate. Reducing the recipe by half is fine as long as you stick to weight measurements.

Step Three: Get Ready

Prepare everything you need before diving in. Toffee is quick, detail-oriented work. You won’t have time to go looking for the pan you need later on.

I recommend having on hand:

  • All your toffee ingredients pre-measured, except chocolate and toppings
  • Your heavy-bottomed pot, heat safe spoon, and candy thermometer
  • A pastry brush and small bowl of water
  • A small pot of water, kept hot on a nearby burner, and a tablespoon
  • Two or three baking sheets covered with good quality parchment paper or silicone baking mats, and your heat-safe spatula nearby.
  • The pastry brush, small bowl of water, and pot of hot water are all tools you’ll need to prevent toffee disaster. I’ll explain how to use those later.

Step four: Make Your Toffee

Once you start this step, you’re in it for the long haul, so make sure you have 30-45 minutes of uninterrupted time ahead of you. Here’s how you do it:

  1. Clip your candy thermometer to the inside of your pot, so that it will be fully submerged.
    Add the butter to your heavy bottom pot and melt over a medium-high heat. Bring the butter to a boil. Then add the warm water.
  2. Bring the mixture to a boil again and add the sugar and salt.
  3. Carefully and quickly stir in the sugar with your heat safe spoon to dissolve it as efficiently as possible. Try to avoid splashing the sugar around the edges of the pot.
  4. Take your pastry brush and bowl of water and wash down the sides of the pot, thermometer, and spoon to dissolve any sugar crystals. This preventative measure will keep the undissolved sugar from reacting to the butter and separating the mixture.
  5. Stir slowly and consistently and watch your candy thermometer like a hawk. The mixture will slowly turn a golden brown and begin to thicken.
  6. The mixture should be boiling for a minimum of 20 minutes before it reaches the magic number of 298 degrees, which is when the mixture enters the “hard crack” stage. If you boil it for less than 20 minutes, your toffee will be yellow and flavorless. Be ready to get moving as soon as it hits 298 degrees because you don’t want to burn the candy.
  7. As soon as you hit 298 degrees (or whatever temperature you calculated earlier) take the pot off the stove, and quickly stir in the vanilla. Make haste to your baking sheets and pour the toffee over them, dividing the mixture up between two or three sheets.
  8. Immediately grab your heat-safe spatula and spread the toffee out thin. The mixture will cool and begin to solidify quickly so keep moving. It doesn’t have to be even or pretty. Often, thinner toffee has the best taste and texture, so don’t be afraid to have spots where the toffee is slightly transparent.

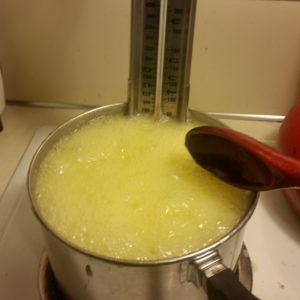
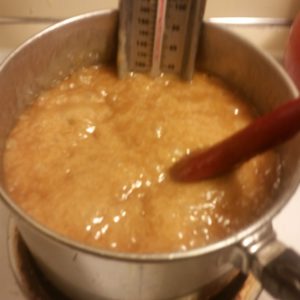
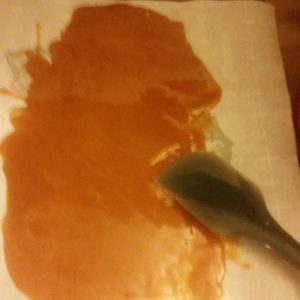
Apologies for the blurry photos. My phone is poor at focusing automatically and I was in a rush to tend to the toffee.

Tip: DON’T TOUCH THE BAKING SHEETS in the 10 minutes after you pour the toffee onto them. That sugar mixture is molten hot and your baking sheets will feel as if they’ve just come out of the oven if you touch them.

Damage Control

Convincing sugar and butter to bond is actually rather difficult and it’s very easy for things to go south quickly. Here are some things to watch out for, and ways to prevent disaster:

–Continue to watch out for undissolved sugar granules around the edges of the pot and use your pastry brush and water to dissolve them. I also pay attention to the texture of the mixture under my spoon. If it feels grainy and rough, there may be some undissolved sugar I need to tend to.

–Never drastically change the temperature of your toffee, either by suddenly cranking up the heat, or taking it off the stove, etc. Always make temperature shifts slowly.

–Don’t stir too quickly or with a metal spoon, as this will cool down the toffee.

Halting Disaster

If you start to notice pools of butter collecting on the edges of your brown sticky mixture, you’ll want to act fast. This means that the sugar and butter are starting to separate. Here’s how to handle the situation:

  • The first thing to try is to take the pot off the heat and stir constantly and smoothly (but not quickly!) to see if it re-integrates. Then slowly return it to the heat, continuing your stirring.
  • If that doesn’t work, grab your handy tablespoon and hot water that you had ready and waiting. Carefully pour a tablespoon of hot water into your toffee and stir. BE CAREFUL! The mixture will likely sputter, and hot sugar can be really dangerous. Stir in the water and see if the butter stops separating. You can add up to 4 tablespoons of hot water, one tablespoon at a time, in order to save your toffee. But if you get to 4 and you’re still seeking yellow fat creeping up at the edges, then I’m sorry to say your candy is unsalvageable.
  • If your toffee separates after you’ve poured it out, there’s no way to reverse the process.

Step five: Take a Break

Leave your toffee to cool for a minimum of 30 minutes. You’ve finished the most anxiety-inducing part. When you come back, the candy will be rock hard. How cool is that?

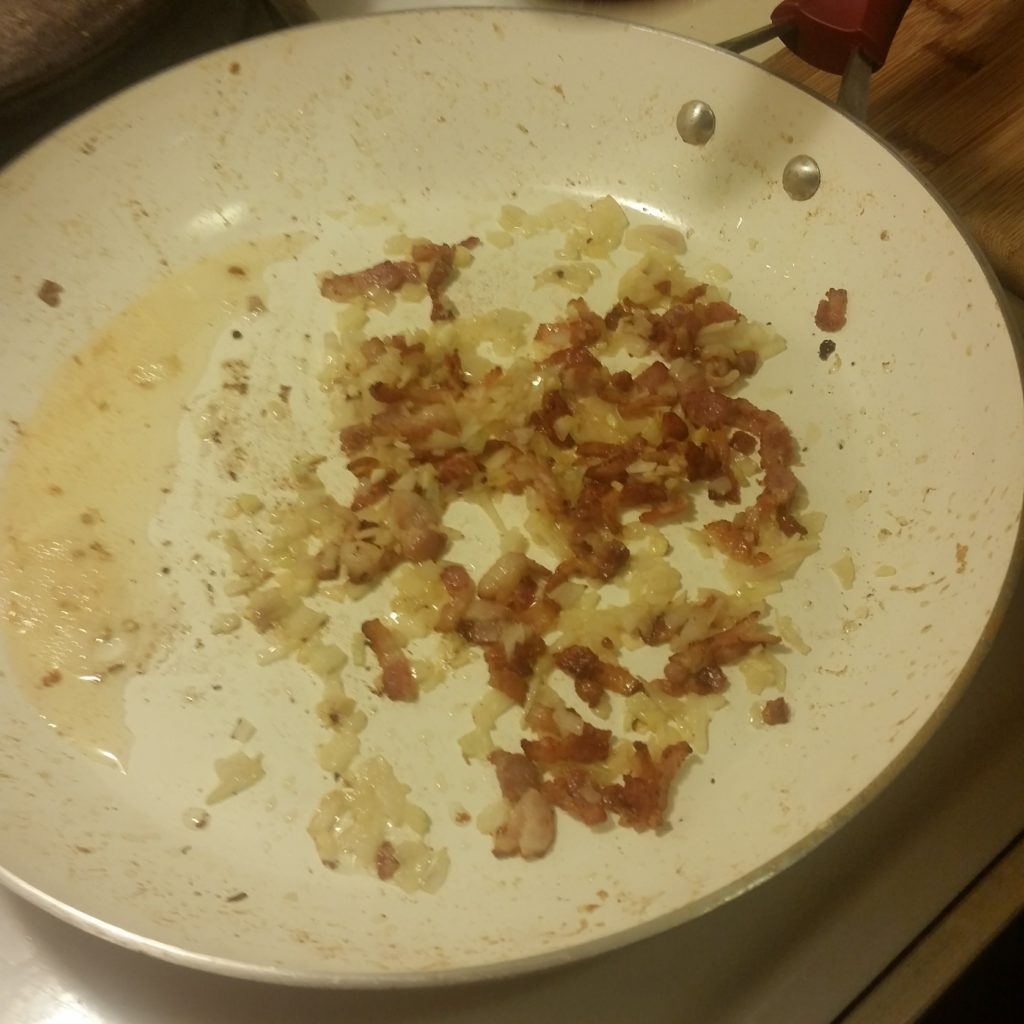
Step six: Prepare Your Toppings

There are many toppings you can choose from for your toffee. Here are a few ideas:

Chopped Nuts: Almonds and Pecans are probably the most popular choices. Choose how finely you want your nuts to be chopped depending on the texture you want for your toffee. For extra depth of flavor, you can toast your nuts before chopping them. Preheat your oven to 350 degrees. On a rimmed baking sheet covered in parchment paper, spread out your nuts in a single layer. Bake the nuts for 5-10 minutes until the nuts have slightly darkened in color and smell lovely. Don’t burn them!

Crushed Candy Canes: What a great way to make this treat holiday themed! Take candy canes and place them in a ziplock back. Put the bag on a cutting board and hit the candy canes with a rolling pin until they are broken into very small pieces. Remember, people will be taking bites of these, so you want the shards to be pretty tiny.

Crushed Pretzels: You can use the same method as with the candy canes to get these to the desired size, for a salty crunch on top of your toffee.

Drizzled chocolate: Melt a second kind of chocolate such as white chocolate, dip a spoon in and drizzle the chocolate in a zig-zag pattern over the standard layer of chocolate.

Sea salt: This is my favorite topping. Ever had salted caramel? Same idea. Just sprinkle a very light layer of salt over the toffee when it’s toppings time.

Preparing the Chocolate

Melt your chocolate in a heat-safe bowl. The best way to ensure well-tempered chocolate is to bring about an inch of water in a small pot to a simmer, place a heat-safe bowl on top of the pot (making sure the bowl does not touch the water) and place the chocolate inside of the bowl, stirring until the chocolate has melted. You can also microwave it 30-45 seconds at a time, stirring between each heating session.

As soon as the chocolate has melted, remove it from your heat source and stir to cool it down. I recommend stirring for 20-30 seconds, then walking away for a few minutes, then stirring again. To check to see if your chocolate is cool enough, dab a tiny bit of chocolate just above your upper lip. When it is ready, it should feel slightly cool on your lip.

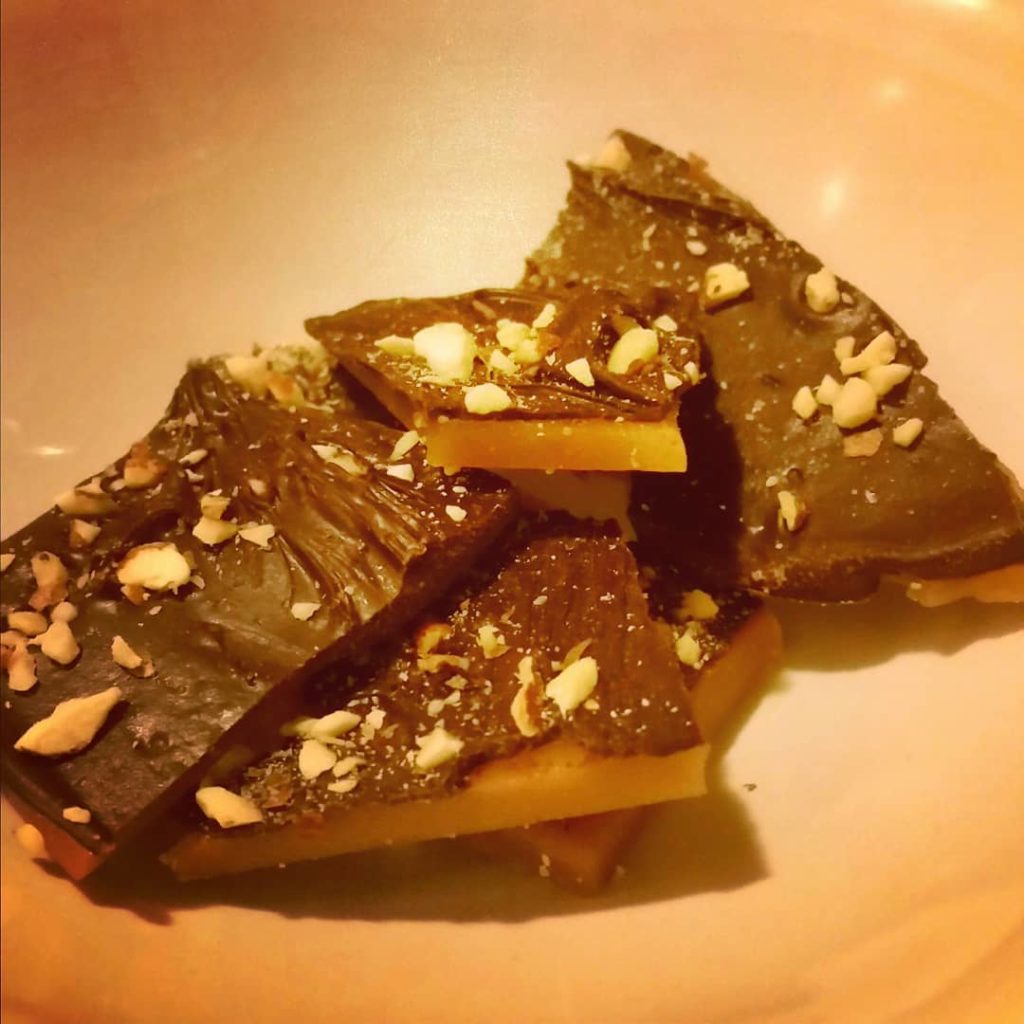
Step seven: Assemble the toffee

Take a paper towel and carefully wipe any excess grease from the top of the toffee.
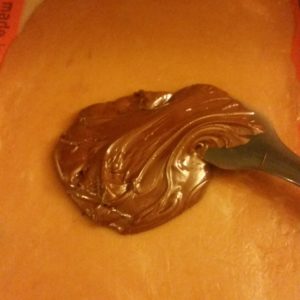
Pour the melted chocolate onto the toffee, dividing it equally between each sheet. I find it works best if you pour it into one pile, rather than over the whole sheet so that it doesn’t cool down too quickly.

Using your spatula (or an offset spatula if you have one) spread the chocolate evenly over the toffee. It doesn’t have to be perfectly smooth, but you want to aim for a consistent layer chocolate over the surface of the candy.

Working quickly before the chocolate sets, sprinkle your toppings over the entire slab of toffee. Err on the side of too many toppings, because some may fall off in the process of breaking the toffee into smaller pieces.

Leave the chocolate to set for at least 30 minutes until there are no wet spots.

Note: If you want both sides of your toffee to be covered in chocolate, double the weight of chocolate listed in the recipe, and repeat the melting, cooling, and spreading process a second time after the first half is set. It’s okay if your toffee cracks a little in the process of lifting it up and turning it over. It’s going to be broken into small pieces anyways.

Step eight: Breaking the Toffee

Now comes the fun part! Carefully lift your toffee off the baking sheet, peeling the baking mat or parchment paper off the bottom. Then, start breaking it!

I like to start by simply dropping it on the baking sheet with some force and then taking a segment and breaking it into smaller and smaller pieces. It’s okay if this is messy, it’s okay if they are all different shapes and sizes. Keep a good grip on both sides of the toffee as you break it, to limit the amount the chocolate and toffee break in different places.

While it’s tempting to leave it in cracker-sized pieces, toffee is very sweet and fairly rich. Smaller is better. You can always eat a second piece if it’s not enough!

Step nine: Storing the toffee

Make sure to keep your toffee in an airtight container in your fridge or freezer. If stored correctly, this toffee can last months and continue to taste just as delicious. I had a little left over from last year’s batch and it tasted just as good as a year ago!

You can buy pretty tins to put the toffee in but I like to decorate cheap Tupperware containers or leftover plastic containers that I saved and washed after eating the contents, use wrapping paper and double-stick tape to cover the labels, fill them with toffee, and give them out as personalized gifts.

How to Make Perfect Easy Hot Chocolate

When I was in high school, there was a little student-run coffee shop in the cafeteria that was open during my free period. Hot chocolate was my go-to substance for stress relief and an energy boost (I’ve never liked the taste of coffee) so I made use of the shop frequently. I drank hot chocolate so frequently that I found out the staff started making bets on whether or not I would order one that day. I ordered a chai latte instead to throw them off.

Green & Black’s cocoa powder used to be my go-to ingredient for Kella’s Special Hot Chocolate, but I was later diagnosed with celiac’s disease, and even something manufactured in a facility with wheat, like Green & Black’s products, was off limits to me.

I experimented with different instant cocoa mixes, but they never quite tasted right, and I found it unnerving that just hot water mixed with a powder could create that kind of texture.

Hot Cocoa Heaven

In the next town over, there used to be an incredible place called Rosie’s Tea House. They served a traditional style high tea including tiny sandwiches, rich soup, mini cheesecakes, and a perfectly brewed pot of tea per person. During one visit there, my friend ordered hot chocolate instead of tea. They brought her an entire teapot of hot chocolate, which she offered to share with me. What followed was the most delicious, most easy to drink hot chocolate I’ve ever tasted in my life.

Ever since, I’ve been determined to replicate that taste and texture. I don’t know if I’ll ever reach hot cocoa nirvana again, but this recipe is so easy, tasty, and customizable that it does the job just fine. No mixes, no stove top, no fancy ingredients required. And I even developed a special mixing technique that avoids all those undissolvable lumps of cocoa powder!

Perfect for chilly weather, here's an easy-to-make delicious recipe for hot chocolate, including suggestions for how to keep this simple classic fun and interesting

Course Dessert
Total Time 10 minutes
Servings 1 person

Ingredients

  • 2 tbsp white sugar
  • 1 ¼ tsp cocoa powder
  • 8 oz milk (I prefer 2% but use whatever you like)
  • ¼ tsp of vanilla extract
  • ¼ tsp of other flavors of your choice optional
  • Toppings of your choice optional

Equipment

  • A large microwave-safe mug
  • A fork
  • A microwave

Instructions

  1. Measure your sugar and cocoa powder into the mug. Use a fork to combine the two, eliminating any clumps of cocoa powder.
  2. Pour a very small splash of milk into the sugar/cocoa mixture. Mix together with your fork until it forms a smooth, brown paste. Make sure to incorporate all the cocoa powder so that there are no dry crumbles left around the edges.
  3. Pour a little more milk in, and mix again until the texture is consistent. Slowly pour in the remaining milk and mix one more time.
  4. Microwave for 1 minute. (You’ll want to reduce this time if you have a powerful microwave. The mixture should be warm but not hot after the first nuking session).
  5. Take the mixture out, pour in your vanilla and/or other flavors, and mix. I don’t actually measure the vanilla, I just pour a little into the cap, and carefully add a few drops to the mug.
  6. Return mug to the microwave and heat for 1 minute and 30 seconds. Check temperature by taking a taste, and add an additional 20-30 seconds if needed.

Recipe Notes

Tip: DO NOT USE SPECIAL DARK COCOA POWDER or other Dutch processed cocoas. This extra dark and rich ingredient is incredible in baked goods but doesn’t dissolve properly in milk, and your drink will come out grainy.

Possible flavors to try:

  • Peppermint extract- This makes ordinary cocoa instantly taste like something special from Dutch Brothers! You only need a tiny bit. ¼ tsp is plenty.
  • Candy Cane- For a similar effect as the peppermint extract that’s loads cheaper and comes with built-in holiday flare, stir your hot chocolate with a candy cane. The peppermint candy will melt and gradually infuse the drink with its flavor.
  • Almond extract- Just ½ tsp of this will make for a really lovely, rich and indulgent drink.
  • Bailey’s Irish Cream- For an adult version, add about a shot’s worth of the original or the Hazelnut flavor. It will make you feel warm and cozy all the way down to your toes.


Toppings:

  • Marshmallows- These are obviously the classic choice. I find marshmallows taste the best if you place them on top of your cocoa, and then place the mug back in the microwave for another 20-30 seconds so that the marshmallows are nice and gooey.
  • Mini Marshmallows- A playful alternative with a similar effect!
  • Whipped Cream- Freshly made or sprayed out of a can. Either is light, fluffy, and delicious.
  • Sprinkles- Perfect way to add a fun visual theme to your treat.
  • Salted Caramel- *Drools* Do I need to explain this one?
  • Cool Whip- MY PERSONAL FAVORITE! A big scoop of Cool Whip that’s been kept in the freezer will melt slowly and turn into foam. As you take your first sip, you’ll taste the cold creamy topping contrasting with the hot rich chocolate. It’s simply the best.

Mix and match your favorite combos. The possibilities are endless once you have the basic hot chocolate down! Let me know your flavor and toppings suggestions in the comments below.

How to Make a Holiday Feast for Two (Part 1)

A few years ago, I found myself in a unique situation regarding holidays, particularly Thanksgiving. I love food, I love cooking, and I really love holiday feasts. But I was no longer spending holidays with my family, and I had been diagnosed with celiac’s disease, meaning even a small contamination of flour could be enough to make me sick. I had plenty of friends who’d happily invite me to their Thanksgiving, but I was allergic to most if not all of the food. There was no way I was going to ask my friends to re-do all their recipes in order to accommodate little old me!

I was living with my boyfriend at the time, and he too didn’t have an automatic place to go for Thanksgiving, and while he also had invites, he didn’t want to go and leave me at home alone. So I set about developing a set of recipes that would include all the most important parts of a holiday feast, create the feeling of abundance of food, be entirely gluten-free, and be possible for just two people to cook. The amount of food in these recipes is ideal for two people to stuff their faces, and have leftovers for a few days.

Recipe Series for the Holidays

The following recipes are part of a series covering all my favorite dishes for a full Thanksgiving meal, but they could also be used for plenty of other holidays. The full series involves four hubs:

If you can’t afford to go home for the holidays, if home isn’t such a great place for you to be, if you don’t like crowds, or if you have unique food needs that are hard to get around with a table of 10, I hope this recipe series is helpful to you.

Turkey and Stuffing

First comes the question of the turkey. No way was I going to make a whole turkey for just two people! But even turkey breasts are a minimum of 3 lbs and a lot of work. A good friend of mine taught me how to make turkey and stuffing casserole (and gave me his mom’s stuffing recipe as well. Score!).

You simply prepare turkey tenderloins and place them on top of casserole dishes full of stuffing to bake. The recipe below is a great way to still get the stuffing and turkey experience in much less time, with much less work. I, of course, used gluten-free stuffing mix ( I use a local brand called Elegant Elephant) but you can use any stuffing mix you want.

Turkey and Stuffing Casserole

In this recipe series, I teach you how to make a delicious holiday feast for just two people, starting with turkey, stuffing, mashed potatoes, and gravy.
Course Main Course
Cuisine holiday
Prep Time 25 minutes
Cook Time 30 minutes
Total Time 55 minutes
Servings 4 people

Ingredients

  • 1 standard package pre-seasoned stuffing
  • 1/2 C-1 C veggie broth
  • 4+2 tbsp butter
  • 1 small onion chopped
  • 2 stalks of celery chopped
  • C walnuts chopped
  • 4-5 crimini mushrooms chopped
  • 1 egg
  • 2 lbs of turkey tenderloin

Equipment

  • A basting brush
  • 1- 9X13 baking dish or 2 casserole dishes.

Instructions

  1. Preheat the oven to 425 degrees.
  2. Melt the 4tbsp of butter in a large frying pan. Sautee the onions in the butter until clear, then add the celery. Cook until the celery is slightly tender.
  3. In large bowl place ½ C veggie broth and 1 egg. Add the stuffing and mix until moist. You’ll probably need to use your hands.
  4. Add the walnuts, mushrooms, onions, celery, and juices from the pan. Mix together, then add any additional broth needed to make the stuffing relatively wet.
  5. With a paper towel, gently pat the turkey tenderloins dry. Sprinkle both sides with pepper and salt.
  6. Melt the remaining 2 tbsp of butter in a small container, and coat both sides of the turkey generously with it using a basting brush.
  7. Grease the baking dishes, then place stuffing evenly over the bottom and the turkey tenderloins over the top.
  8. Bake uncovered for 30-35 minutes at 425 degrees, or until turkey is lightly golden on top

Easy Delicious Mashed Potatoes and Gravy

Mashed potatoes are a must-have for holidays. They can be a little work intensive but they are worth it. Mashed potatoes can be so delicious, but they can also easily be mediocre. I have a few tips and tricks to keep them extra tasty.

Because our turkey recipe uses just the tenderloins and cooks them over the stuffing, the result is there is no gravy in the pan after baking. To get around this issue, I used pre-made gravy mixes which also saves time and energy. There’s no shame in using a mix, and this gravy works just as well on turkey and stuffing too.

Easy Mashed Potatoes and Gravy

Course Side Dish
Prep Time 15 minutes
Cook Time 30 minutes
Total Time 45 minutes
Servings 4 people

Ingredients

  • 1 1/2 lbs Yukon gold potatoes
  • 1 tbsp milk
  • 1/4 C heavy cream
  • 2 tbsp butter
  • Salt and pepper
  • 2 packets gravy mix

Equipment

  • A potato masher

Instructions

  1. Peel and chop the potatoes into large chunks. The more consistent the sizing of the pieces of potato, the more evenly they will cook, and the more consistent the texture of your final dish will be.
  2. Place the potatoes into a large pot and cover with water. Bring to a boil. Always put the potatoes in before boiling the water, to ensure even cooking.
  3. Once the water is boiling, reduce the heat to a simmer, cover, and cook for 15-20 minutes until a fork slides into the potatoes easily.
  4. Drain the water from the potatoes and then leave them alone so the steam can rise from them for 5-10 minutes. This keeps your potatoes from getting watery.
  5. Warm your cream and butter together until the butter is melted. Once the steam coming from the potatoes has slowed down, add your cream and butter and mash it all together.
  6. Once fairly well mashed, add the milk, salt, and pepper to taste. Make sure not to over mash or the potatoes will turn an unpleasant texture. Take a taste and adjust the amount of milk, salt, or pepper to your liking.
  7. Follow the packet instructions for the gravy, which usually involves whisking the mix into 1 cup of water, bringing the mixture to a boil, and then simmering for several minutes.
  8. Serve and enjoy!

More to Learn, More to Cook

Now, hop on over to Part 2 where you’ll learn how to make Green beans, Roasted Yams, and Cranberry Sauce, and still yet to come, “How to Cook a Feast with Just Two People” which will include additional instruction on how to plan and execute a full holiday feast with just two people cooking, in only two hours!

If you want some suggestions for gluten-free desserts, check out my recipes for Chocolate Chip Cookies and Blackberry Pie:

How to Make a Holiday Feast for Two (Part 2)

Welcome to part 2 of my recipe series in which I teach you a collection of recipes for two people to cook and eat for the holidays. If you don’t have a big family to spend the occasion with or if crowds aren’t your thing, but you don’t want to miss out on the food, these recipes are for you! In this hub, you’ll learn how to make my own special version of cranberry sauce, green beans with bacon and shallots, and roasted yams. All three recipes are super easy and incredibly tasty. They’re also all gluten-free!

My Mom’s Cranberry Sauce

Every year. my parents and I went to visit a family out of town for the holidays, and since we were their guests, we rarely did much of the cooking. But the one dish my mother would bring every year was her special cranberry sauce. It was sour and bright tasting with a very slight crunch.

It wasn’t until I was a teenager that I realized my mom’s cranberry sauce was utterly different from the cranberry sauce the rest of the world was making and eating. Traditional cranberry sauce is cooked into something that resembles jam, whereas my mother’s sauce is raw, includes almonds and oranges, is served cold, and is similar to a chutney in texture.

When I moved away from home, I found myself regularly craving this cranberry sauce that no one else knew how to make. I got my mom to send me the recipe and I was surprised by how easy it was to make.

This is definitely one of those “about a handful of this and a dollop of that” recipes. I’ve approximated the amounts needed, but you should experiment with the taste and texture til you get a version you like. Try different types of citrus or nuts, make the sauce chunkier or more liquidy, sour or sweet. I’m curious about the difference in flavor if you blanch or toast the almonds first. You get to choose!

Mom's Cranberry Sauce

Summary: A cold version of traditional cranberry sauce including crunchy almonds for texture.
Course Side Dish
Prep Time 15 minutes
Servings 8 people

Ingredients

  • 12- oz cranberries one standard-sized package
  • 1 large seedless orange
  • C almonds
  • 1-2 tsp almond extract
  • 1-2 tbsp sugar
  • 1/2 C apple juice

Equipment

  • A blender or food processor

Instructions

  1. Place just the almonds in the blender and chop them on their own.
  2. Add the full package of cranberries and blend again. If blending is difficult, add a little of the apple juice to get things moving.
  3. Peel the orange, removing as many of the white bits as you can. Place the individual segments in the blender along with the almond extract, and blend. Add more apple juice if the blending is slow.
  4. Here’s where the fun begins. Take a taste and see what you think. You will probably want to add some sugar and the rest of the apple juice at this point, but start with small amounts and work your way up.
  5. Adjust the sugar, almond extract, and apple juice until you get the flavor and texture you want. If it gets too sweet, you can add some lemon juice.
  6. Eat cold by itself or on top of turkey and enjoy!

I’d really love to hear from some folks who try this recipe since I’m the only one I know who makes it. How did you eat it? What additions did you try? Let me know in the comments!

Now on to our next recipe.

How to Make Green Beans with Bacon and Shallots

I’ve known for a while that I’m not very good at making green beans. I’d boil them for 10-15 minutes, drain them, and then serve them with butter and salt. They were passable but I knew there had to be a way to make them tastier.

Determined to improve my green-beans cooking technique, I stumbled on a recipe online that looked easy. I tried it and it’s one of the most delicious dishes I’ve ever made! It’s so simple, so yummy, and while the dish is cooked in bacon grease, the green beans are still very crunchy, meaning you’re getting way more nutrients out of them than if you steamed or boiled them to death.

This recipe also reheats surprisingly well. The flavor of the garlic and shallots are absorbed by the bacon grease, which coats the green beans, making leftovers extremely tasty 2-3 days later.

Sauteed Green Beans, Bacon and Shallots

Sauteed green beans with bacon and shallots.
Course Side Dish
Prep Time 10 minutes
Cook Time 20 minutes
Total Time 30 minutes
Servings 4 people

Ingredients

  • ¾ lb-1 lb of green beans
  • Ice
  • 2 slices of bacon sliced into tiny strips
  • 1 small shallot sliced
  • 1 large clove of garlic sliced
  • Salt and pepper

Instructions

  1. Trim the tops and bottoms of the green beans.
  2. In a large pot, boil water. Once boiling, salt the water as you would water for pasta so that the water tastes slightly salty. Only a little of the salt will be absorbed by the green beans so don’t worry if it seems to like a lot.
  3. Add the green beans to the boiling water, reduce the heat, and cover. Cook for 2 minutes.
  4. Take a large bowl and fill with ice and cold water. Once green beans have finished cooking, strain the green beans and place them in the ice water. Make sure the green beans are fully submerged and leave them to chill until they feel cold to touch.
  5. Heat a large frying pan over medium-high heat. Add the bacon and fry until the meat starts to turn brown and crispy. If there is more than a tablespoon or two of grease in the pan, pour out the excess grease.
  6. Add the shallots and the garlic to the pan and fry for about a minute.
  7. Add the green beans to the frying pan and cook until they are heated through. Add salt and pepper to taste. Don’t be afraid to grab a bean and try one for temperature and to adjust the seasoning!
  8. Serve and enjoy.

TIP: You can boil your green beans ahead of time and once they’ve cooled completely, you can keep them in the fridge or in the ice bath until it’s time to fry them.

If you want to make a vegetarian/pork-free version of this recipe, replace the bacon with 1 tbsp olive oil and 1 tbsp of melted butter, and increase the salt. Fry the garlic and shallot in the butter/oil mixture for several minutes, and then add the green beans, making sure they are thoroughly coated. The dish won’t be as intensely flavorful, but it will still make crisp, tasty green beans.

Next recipe!

How to Roast Yams

This recipe could not be simpler and it produces the most delicious, naturally sweet yams. I cook it every year at Thanksgiving, it takes five minutes of prep, and it’s incredible every time.

Roasted Yams

The simplest, easiest, tastiest ways to roast yams.
Course Side Dish
Prep Time 5 minutes
Cook Time 45 minutes
Total Time 50 minutes
Servings 4 people

Ingredients

  • 4-6 whole yams
  • ¼ C oil canola, vegetable, and coconut all work well
  • Butter for serving

Equipment

  • A baking sheet with a lip around the edge
  • Tin foil
  • A basting brush

Instructions

  1. Preheat the oven to 425 degrees F.
  2. Thoroughly cover your baking sheet with tinfoil. If you are worried about the surface of the baking sheet turning brown, use two layers.
  3. Line up your yams on the baking tray. Long thin yams with a smooth surface are the best for baking evenly all the way through. Prick them 6-8 times each with a fork or knife.
  4. Lightly brush your yams all over with a thin layer of oil. You’re not looking to douse them. You just want the oil to create a seal that keeps the moisture inside.
  5. Bake for 45 minutes.
  6. Cut them open and serve with butter or brown sugar for a really special treat. That’s it!

Recipe Notes

If liquid is burbling and popping out of and around your yams, that’s okay! That means it’s caramelizing and that’s a good thing. If you’re concerned about the oil reaching high temperatures in the oven, err on the side of less oil when you brush the yams.

How to Put It All Together

  • This post is just one part of the whole holiday feast. Check out the others too:
    Next up, I’ll teach you how to coordinate cooking 5-6 dishes at the same time with just two people, and be finished cooking in just a few hours!
  • Make sure to look at Part 1 if you missed it, which includes how to make turkey and stuffing for two, and mashed potatoes.
  • Here I show you how to make a classic Blackberry Pie, including my gluten-free pie crust recipe.