How to Make Lemon Chicken

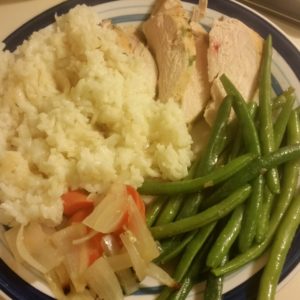
Years ago I had dinner at a friends’ house and they served the most incredible chicken with creamy lemon sauce and rice. To this day, I don’t know what was in that dish, but I’ve made it my life’s work to create something just as tasty. My current incarnation: Lemon chicken with sauteed green beans, lemon drenched vegetables, and broth flavored rice.

This recipe is a dish that I’m constantly evolving and updating. I recently learned a new method of cooking chicken so it will probably update again. But rest assured, if you follow this recipe, you’ll have a tasty meal that you can tweak and change to suit your own preferences:

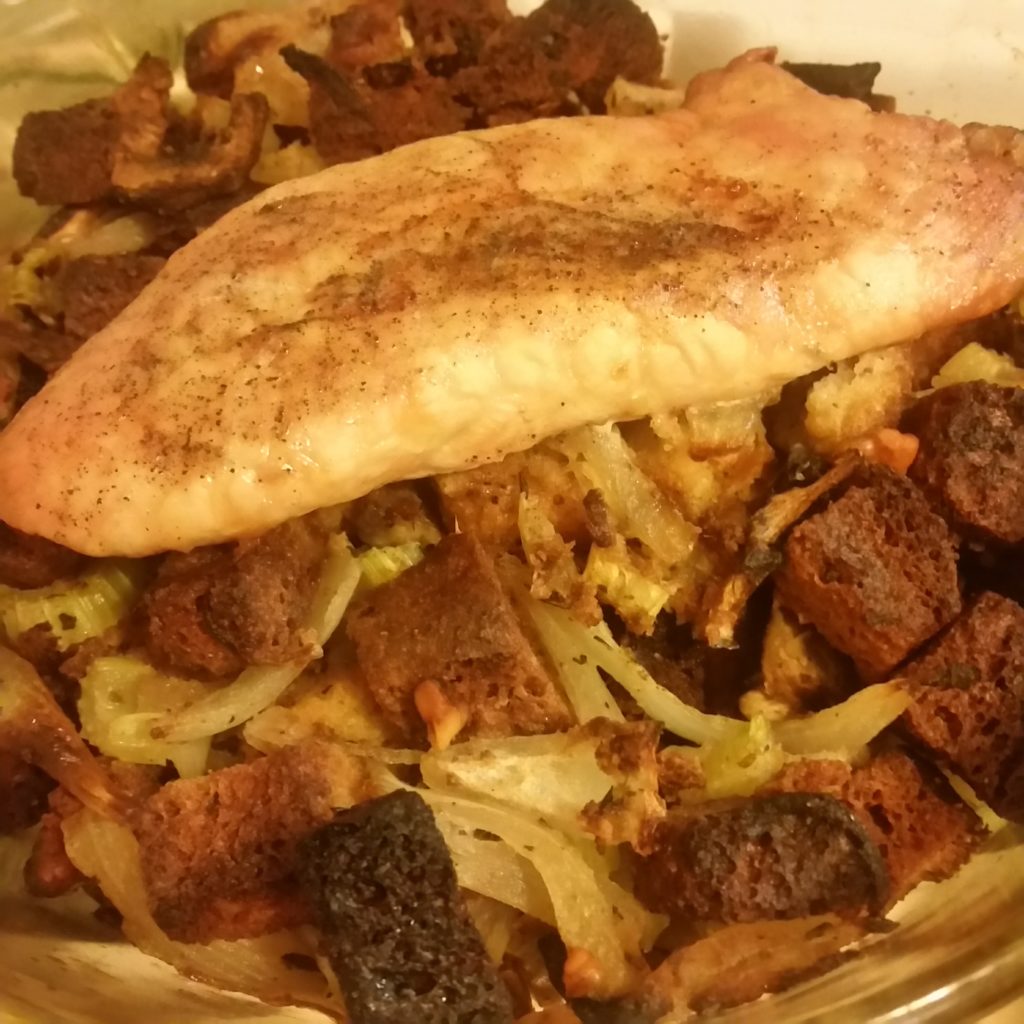
The chicken is moist and delicious. The vegetables cook while soaked in broth and lemon juice, making the most flavorful onions and carrots you’ll ever eat. The green beans are bright green and still have a fresh tasting crunch to them. Once the chicken is done, you’re left with a reduced broth made of lemon juice, chicken stock, garlic, and juices from the vegetables. Pour this broth generously over your rice and chicken for an added treat.

Lemon Chicken and Sides

A delicious and easy recipe for lemon chicken, green beans and rice that’s overflowing with flavor.
Course Main Course, Side Dish
Prep Time 30 minutes
Cook Time 20 minutes
Passive time 2 hours 40 minutes
Servings 4 people

Ingredients

  • 1.5 lbs of chicken breast
  • ½ C lemon juice
  • 2 large cloves of garlic
  • 1 tsp lemon zest
  • Salt and pepper
  • 2 carrots
  • 1 small onion
  • 1 cup chicken broth
  • Sprigs of fresh thyme

Sauteed Green Beans

  • ¾ lb of green beans
  • 2 tbsp butter
  • Ice
  • 1 small shallot sliced

Side of Rice

  • 1.5 cups white rice
  • 2 small chicken bouillon cubes or 1 large one

Instructions

Chicken and Rice

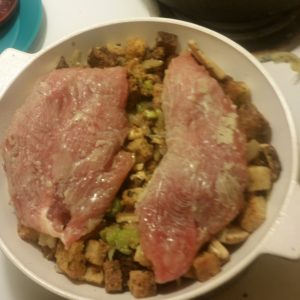
  1. Take a medium sized casserole dish and place your chicken breasts inside. Sprinkle both sides of the chicken with salt, pepper, and lemon zest. Take one of your garlic cloves, peel it, and push it through a garlic press (or chop it very small). Disperse the minced garlic evenly over the chicken. Liberally pour your lemon juice over the top of the chicken. If your chicken breasts are very large, cut them in half so that more surface area is exposed to the marinade and it cooks more evenly. Cover with plastic wrap and place in the fridge to marinate for 2-3 hours.
  2. Take your chicken out of the fridge about 10 minutes before cooking time. Preheat your oven to 400 degrees F.
  3. Take your rice and put it in a medium-large pot along with 5.25 cups of hot water. Add your two chicken bullion cubes and place over medium heat with the lid mostly covering the top for about 30 minutes. Stir the rice periodically to ensure the bouillon cubes are fully dissolved. When there is very little water remaining in the pot, turn off the heat, and cover the pot with a lid completely.
  4. Wash (but don’t peel!) and chop your carrot and onion into medium chunks. Lift up your chicken breasts and cover the bottom of the casserole dish with the vegetables, placing the chicken on top.
  5. Take half of your chicken stock, heat it up for a minute in the microwave or on the stove, and pour it into the casserole dish over your vegetables.
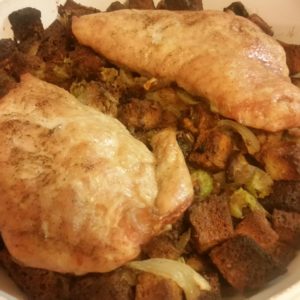
  6. Bake, uncovered, for 35-40 minutes.
  7. Halfway through cooking time, take a heat safe spoon and baste the top of your chicken.
  8. Remove the pan from the oven, and carefully remove the chicken breasts from the pan, setting them aside to rest. If you are unsure whether they are cooked through, slice the fattest part of the chicken breast open and check for any pinkness.
  9. Take the remainder of your chicken broth, heat it up, and add it to the liquid in the casserole dish. Take a heat-safe spatula and carefully splash the liquid around the edges of the pan where bits of brown concentrated flavor are stuck to the pan. Use the liquid to dissolve the brown bits and mix them into the liquid. Taste it and adjust seasoning as needed.

Sauteed Green Beans

  1. This recipe is a variation on the recipe listed in my gluten-free holiday feast for two guide. I recommend starting the green beans once your chicken is in the oven, pre-chopping your garlic and shallots, and then beginning to melt your butter about 10 minutes before your chicken is due to come out of the oven.
  2. Top and tail your green beans. Fill a large pot with water and bring it to a boil. Salt the water and add the green beans. Boil for 2 minutes.
  3. Fill a large bowl with ice and cold water. Once the green beans are done, drain them, and plop them into the ice water. Make sure they are fully submerged. The green beans can stay in the ice water until it’s time to cook them.
  4. In a large frying pan, melt the 2 tbsp of butter. Add your shallot and your other clove of garlic, both chopped small. Caramelize them in the butter for a few minutes.
  5. When the green beans are cold all the way through, pull them out of the ice water and place them in the frying pan. Toss them in the butter, shallots, and garlic. Add salt and pepper to taste. The green beans are done when they are heated all the way through.

A Full Meal Ready to Eat

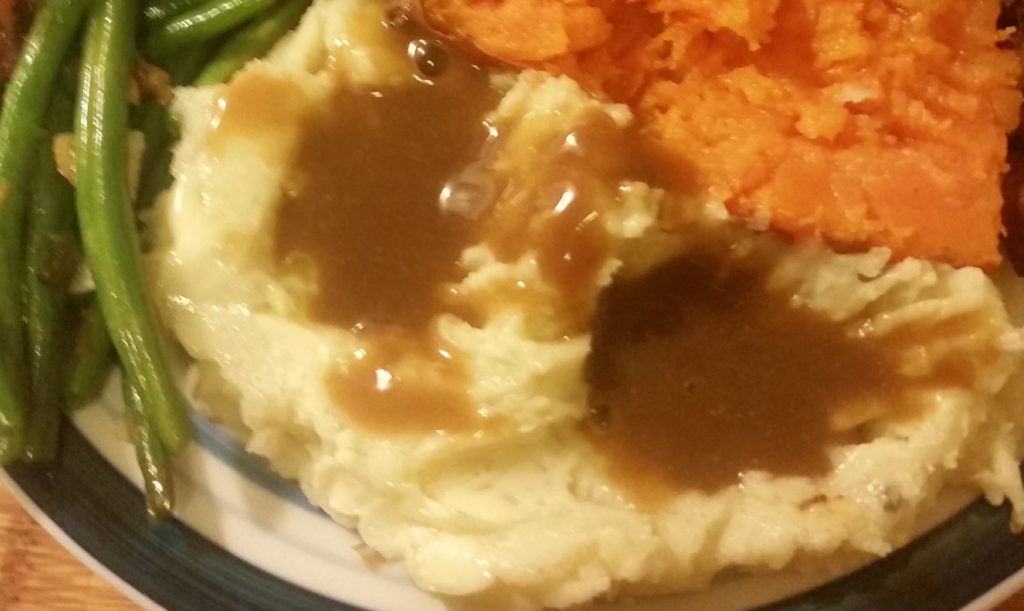
My favorite way to eat this meal is 4-5 large slices of chicken, with the broth poured on top, a good mound of green beans, a small pile of onions and carrots to mix in with the rice and chicken for added flavor, and a large mound of rice, topped with a little butter, spoonfuls of the broth, and some extra lemon juice to make it really sing.

This recipe also makes customization really easy. You can swap out the vegetables for whatever

you like. You can use brown rice instead of white rice if you want something more nutritious.

For brown rice, put 2 ¼ cups water into your pot and bring to a boil. Add the bouillon cubes and stir until fully dissolved. Add 1 cup of brown rice, cover completely, and reduce the heat to bring the water down to a steady simmer. Simmer the rice for 45 minutes, with the lid on at all times. Turn off the heat, leaving the lid on, and let it rest for an additional 15 minutes before serving.

I stick to chicken breast for this recipe because I’m not fond of the taste or texture of dark meat, but chicken thighs will bring in more flavor. If you use chicken thigh instead, add olive oil to the marinade in the beginning. Olive oil doesn’t penetrate chicken breast; therefore, it can’t be absorbed during the marinating process, but a chicken thigh will absorb it just fine.

I hope you enjoy this recipe. If you come up with some great adjustments to it, let me know in the comments below!

How to Make Ragu Style Pasta Sauce (And Gluten-Free Pasta)

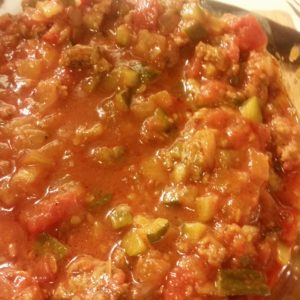
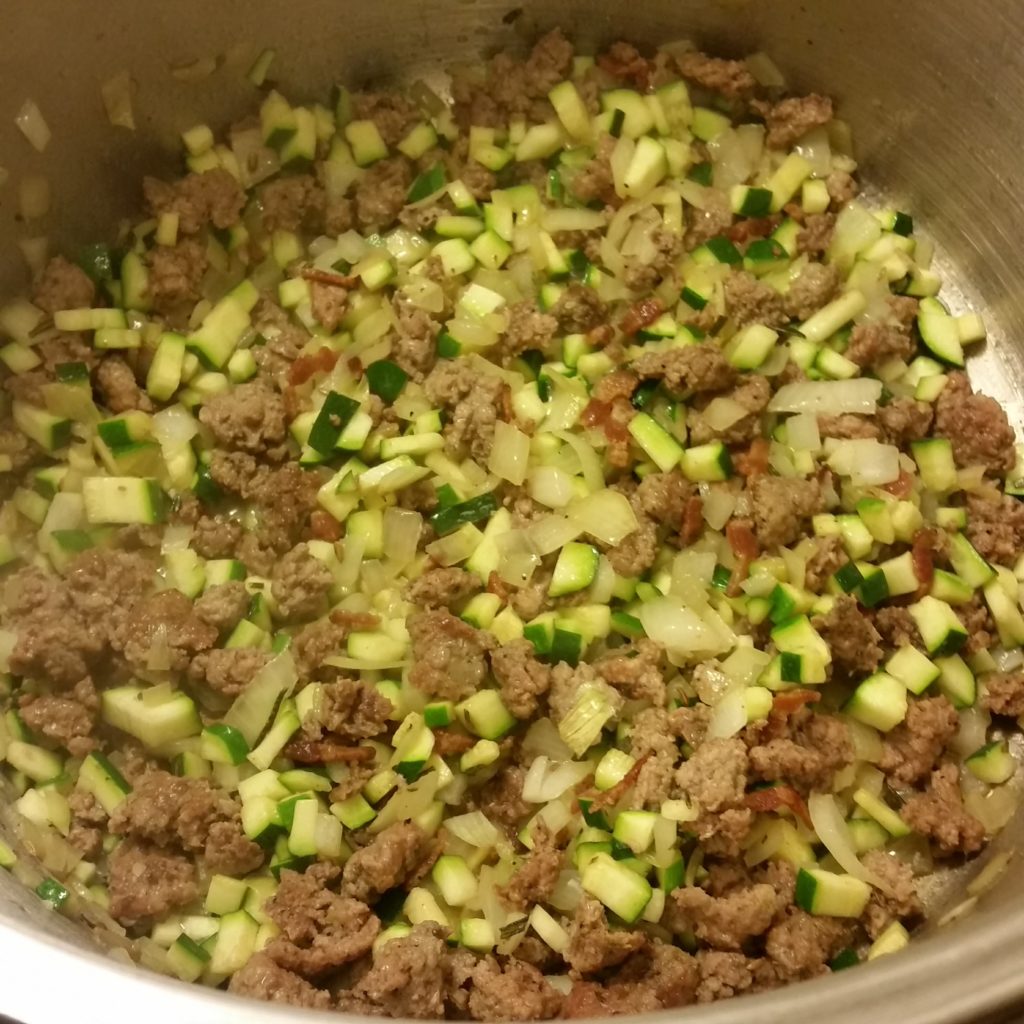
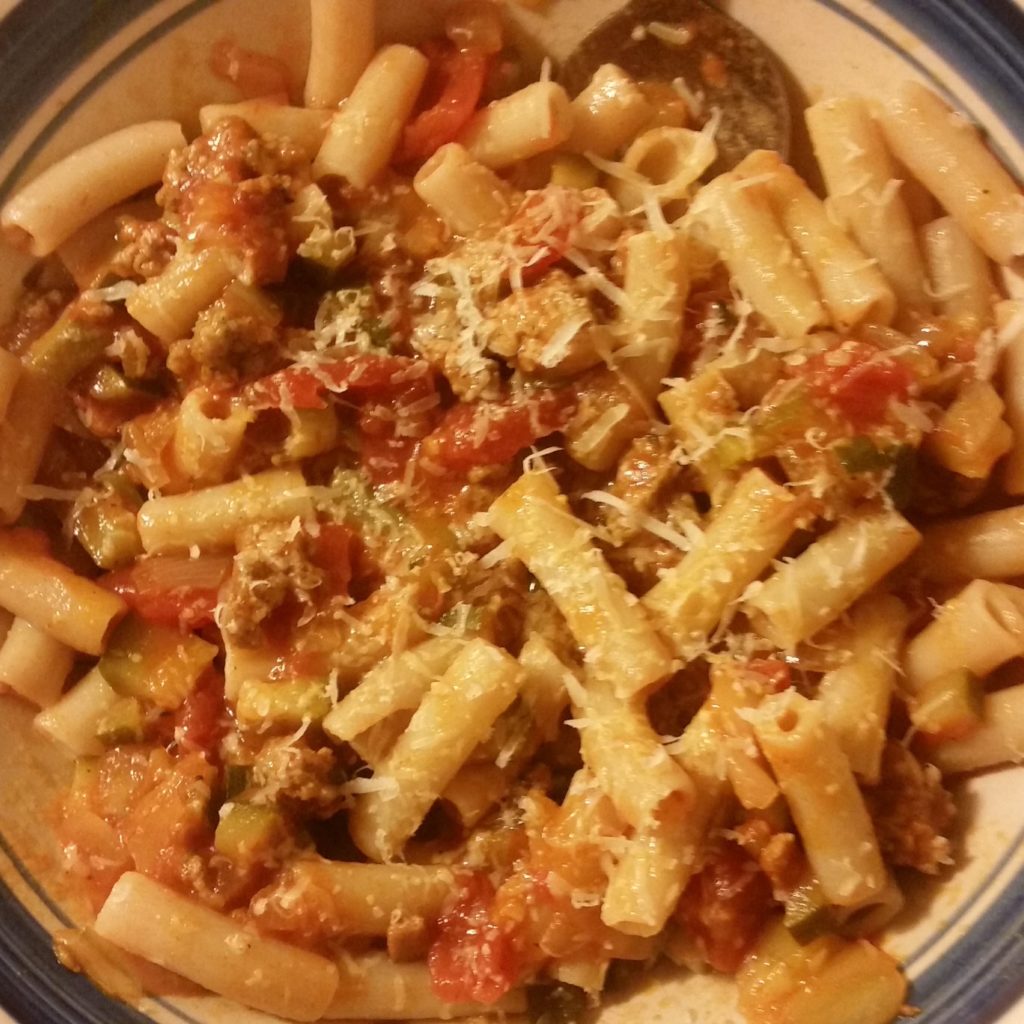
This ragu style pasta sauce has become one of my go-to recipes. It’s an adaptation of a recipe I learned from Jamie Oliver and it requires mostly ingredients that I already have on hand around the house, the prep is super quick, and while the sauce is slowly simmering, you can sit back and relax.

Ragu sauce refers to a sauce made of many tiny little pieces of meat and vegetables. This recipe includes Italian sausage, bacon, onions, and zucchini, but you can add as many finely chopped or grated vegetables as you want. The technique involved in making this sauce makes it easy to add extra veggies while all you’ll taste is rich smoky tomato goodness.

This sauce reheats well and freezes well. I highly recommend making a large batch, approximately double this recipe, and freezing it.

To freeze your sauce, get some large ziplock bags. You’ll want the nice ones because you don’t want your sauce leaking out the top due to a finicky seal. Fill the bag about halfway with pasta sauce, squeeze the air out of the top as best you can, seal the top, and then flatten the bag out until you have an even, flat square of pasta sauce in a bag. Freeze it laid out flat, and once it’s solid, you can store it upright. Freezing it this way means that it solidifies faster, it’s easy to store, and it thaws more quickly.

Now, on to the recipe!

Ragu-Style Pasta Sauce

Summary: A recipe for ragu-style pasta sauce packed with vegetables, meat, and flavor that will become a household staple in no time. Bonus: a brief guide to gluten-free pasta.
Course Main Course
Prep Time 15 minutes
Cook Time 30 minutes
Passive 45 minutes
Servings 6 people

Ingredients

  • olive oil
  • 2 big sprigs fresh rosemary
  • 1/4 lb bacon
  • 1 lb ground hamburger or Italian sausage
  • 1 onion
  • 2 large zucchini
  • 2 heaped tbsp tomato paste
  • 1 28- oz can diced tomatoes
  • 1 14- oz can crushed tomatoes
  • 28 oz water
  • Salt and pepper
  • Pasta

Instructions

  1. Turn the heat up to medium-high beneath a large pot and once it’s hot, add olive oil. Chop rosemary and bacon into small bits and add it to the pot. Fry until bacon is beginning to turn crispy.
  2. Break up the sausage meat into small pieces and add to pan. Break into smaller pieces as it browns. This will take some effort. Hamburger will break down easily, but I like the flavor of Italian sausage meat better and it likes to stay in larger clumps. Fry the meat until lightly golden and the sizzling noises in the pan have increased again, approximately 10 minutes.
  3. Chop onion and zucchini very small. Add to the pot and fry for approximately 10 minutes.
  4. Add tomato paste, diced tomatoes, crushed tomatoes, and water. Season with salt and pepper.
  5. Simmer for 30-45 minutes until reduced to a thick sauce.
  6. Bring a medium pot of water to a boil and salt the water. Cook your pasta according to the directions. With a slotted spoon, lift the pasta directly out of the water into a bowl, or drain the pasta but save some of the water it was cooked in.
  7. Add your finished sauce to your bowl of pasta and add a splash of pasta water. Mix well. The starch in the pasta water helps the pasta and the sauce bind together and the sauce will become smooth and evenly distributed. Finish with a sprinkle of freshly grated parmesan cheese.

TIP: Tomato paste in a little can is super cheap so it makes sense to grab that off the grocery shelf when tomato paste is needed. But if you’re like me, every time you buy it, you only use a few tablespoons, can’t be bothered to transfer the contents to a Tupperware, and the rest goes bad in the can. It’s actually worth it to spend the extra money for tomato paste in a glass jar or a squeeze tube. Some brands to look for: Bionaturae makes tomato paste in a jar and Amore, Cento, San Marzano, and Alessi all make squeeze tubes that close with a cap.

Some easy variations for this recipe:

  • Use half hamburger and half Italian sauce, or half hamburger and half ground pork sausage.
  • Replace half the meat with cooked lentils to cut down on cost.
  • Use a food processor to shred your onion and zucchini or additional veggies like carrots and cabbage to bulk out the sauce and sneak vegetables into your kids’ meal.

Gluten-Free Pasta

Because I specialize in gluten-free recipes I need to discuss the art of making gluten-free pasta and a few pasta brands. Gluten-free pasta has a reputation for being flavorless, mushy, and easily disintegrated into many little pieces.

For tasty, non-mushy gluten-free pasta, follow these rules:

  1. Stir regularly while the pasta is cooking, especially in the first couple minutes as the pasta is just beginning to soften.
  2. Never overcook gluten-free pasta. Err on the side of undercooking it so you get nice chewy al dente pasta.
  3. Once it has finished cooking, make sure to rinse the pasta in very hot water to keep it from sticking together and becoming one big pasta monster clump.

By far the best gluten-free pasta brand available is Tinkyada. They make dozens of pasta shapes, including Lasagna, fettuccine, and large shells for stuffing. They taste pretty much like normal pasta! Tinkyada doesn’t always reheat well and isn’t that great cold, so stick to making the pasta fresh when you need it like the Italians do. Tinkyada is so good I basically never reach for any other brand.

Other brands that carry gluten-free pasta that you might see are Jovial, Bionaturae, Barilla, and Ancient Harvest. I have not tried gluten-free pasta by Jovial but I’ve heard they are great and made from organic whole grain rice, which is pretty refreshing in contrast to so many gluten-free products that have very little nutritional value. I also have not tried Barilla’s gluten-free pasta, but they’re rated highly and they’re widely available in a pretty large variety of shapes. Bionaturae is just okay as it’s closer to what you would expect gluten-free pasta to taste like. I’d avoid Ancient Harvest if you can help it. The taste of the pasta overpowers whatever sauce you put on it, and not in a good way.

I hope you enjoy this ragu style pasta sauce and mini gluten-free pasta guide and that this recipe will become a staple in your household in the future.

How to Make Gluten-Free Pizza

Gluten-Free Pizza is probably one of the most sought-after dishes in the gluten-free world. It’s so easy to buy a frozen pizza, order delivery, or even buy pre-made pizza dough and bake your own when you can eat gluten. But when you make the transition to gluten-free, freshly made pizza dough is non-existent, and frozen or delivered pizzas are rare, expensive, and not that good. It’s simply impossible to give up pizza, so how can you fill that pizza shaped hole in your heart while still avoid gluten?

Wrangling Gluten-Free Pizza Dough

One of the trickiest problems that gluten-free baking encounters is the dough issue. The thing that makes gluten-based bread products so easy to work with is that mixing even just flour and water creates a substance that’s easy to mold and form into any shape you want, bake it, and it tastes amazing! With gluten-free baking, in order to get the same texture in the final product, it’s rare the “dough” will function in the same way.

Typically gluten-free dough is soft, slightly wet, and requires water and a spatula to shape properly. That means your pizza board might not work so well for this recipe. You’re going to want a large baking sheet with a lip all the way around so that the dough doesn’t flow right off the edges. But the finished product is fluffy, yeasty, with a little bit of chew, and just delicious.

Developing a Gluten-Free Pizza Dough Recipe

This recipe was inspired by an incredible boxed mix for pizza dough by Gluten Free Pantry (which I cannot for the life of me find online so perhaps it’s no longer available in stores). I tried it out after receiving a box for free at the grocery store I used to work at. The recipe made a huge amount of dough, and my friend and I delightedly baked a gigantic pizza, only to be blown away by how delicious the crust was. It was so good that, despite the cost of the box mix alone ringing in at $6, I still bought it every time I wanted pizza.

However, as I looked over the ingredient list, I realized that I had just about all those same ingredients in my kitchen already. Using the weight of the box, the order the ingredients were listed in, my general knowledge of gluten-free baking, and a little math, I worked out a copycat recipe. A few failed attempts later and I had a recipe that tasted almost identical!

Gluten-Free Pizza

Miss pizza? Satisfy your cravings for chewy, fluffy pizza crust with this recipe for gluten-free pan-style pizza large enough to feed a family.
Course Main Course
Prep Time 1 hour
Cook Time 10 minutes
Passive 20 minutes

Ingredients

  • 1.75 C white rice flour
  • 1/2 C brown rice flour
  • 3/4 C potato starch
  • 3/4 C cornstarch
  • 2.5 tsp xanthan gum
  • 2.25 tsp yeast or 1 packet of yeast
  • 1 3/4 C warm milk
  • 3 tbsp brown sugar
  • 2 tsp salt
  • 1 egg
  • 3 egg whites lightly beaten
  • 2 tsp Apple Cider Vinegar
  • 1/3 C vegetable oil

Toppings

  • Half jar of pasta sauce
  • 12-16 oz grated mozzarella and jack cheese about 2 parts mozzarella to 1 part jack cheese
  • 1 can quartered artichoke hearts
  • 1 red bell pepper chopped

Important Equipment

  • Rimmed baking sheet
  • Kitchenaid or hand mixer
  • Spatula

Instructions

  1. Preheat your oven to the lowest temperature it will register. I use the “warm” setting on mine, and if you have “proof” as an option, that’s even better.
  2. Place the milk in a microwave-safe container (such as a pyrex measuring cup), and heat the milk for 1-1:45 minutes, depending on the strength of your microwave. You want the milk to be warm to touch but not hot.
  3. Prepare all your dry ingredients in your mixing bowl. Try to keep the yeast and the salt on opposite sides of the bowl.
  4. Beat the three egg whites in a separate small container until they are a little frothy. Add the remaining egg, the vegetable oil and apple cider vinegar to the egg whites.
  5. Once your milk is warm, set your mixer to a low setting, stirring the dry ingredients, and begin slowly pouring in the egg mixture. Once done, quickly switch to gradually adding the milk.
  6. Once the milk is added and slightly incorporated, stop the mixer, scrape down the sides of the bowl and restart the mixing at a slightly higher speed until the dough is uniform in texture. The “dough” will be very silky and thick, close to muffin batter texture.
  7. Turn the mixer up to a medium-high speed and beat on medium high for three minutes. This helps activate the xanthan gum, sort of like kneading develops gluten.
  8. Lightly grease your rimmed cookie sheet. Fill a container with warm water to dip your spatula in. Scrape all of the dough out of the mixing bowl onto the baking sheet.
  9. Begin spreading the dough out into the corners of the sheet. I find using a technique similar to frosting a cake works well, where you’re not scraping the bottom but trying to always have a cushion of dough between you and the baking sheet at all times. You don’t want any see-through spots. Dip the spatula in the water occasionally to prevent the dough from sticking to it as you spread.
  10. Once the dough is spread into all the corners and relatively even and flat, push the dough to the sides of the baking sheet so that there is a small ridge around the edge of the pizza. You can define this edge by using your spatula to draw a line about 3/4 inch from the outside edge of the dough. Don’t worry about making it perfect. Irregularity looks delicious once it’s been baked through.
  11. Place your pizza dough in the warm oven or proofer for 20-minutes to rise.
  12. Prepare your toppings. I’ve suggested mozzarella, jack cheese, red bell pepper and artichoke hearts, but you can use whatever toppings you like!
  13. After 20 minutes, take the risen pizza dough out of the oven, and set the oven to preheat at 450 degrees.
  14. Add a thin layer of sauce evenly across the pizza, leaving the ridge around the edge clear of sauce. You don’t want too much sauce because too much liquid on a gluten-free pizza will make things soggy. Add the rest of your toppings however you like them. I like a very generous layer of cheese in the center and just a little bit of cheese around the edge that will turn crispy and wonderful in the oven, before adding the other toppings.
  15. Bake at 450 degrees for 13-15 minutes. The crust should be golden brown and the cheese should be bubbling and starting to brown. Cut into squares and enjoy!

This pizza reheats fairly well. It loses a little bit of texture in the microwave but is still plenty delicious, and it stays good for about a week after baking if wrapped up well. I’m interested in trying to half this recipe and put it in a standard round pizza pan instead.

I hope you enjoy this gluten-free pizza recipe! Be sure to let me know how yours turns out and what toppings you used!

How to Make a Holiday Feast for Two (Part 1)

A few years ago, I found myself in a unique situation regarding holidays, particularly Thanksgiving. I love food, I love cooking, and I really love holiday feasts. But I was no longer spending holidays with my family, and I had been diagnosed with celiac’s disease, meaning even a small contamination of flour could be enough to make me sick. I had plenty of friends who’d happily invite me to their Thanksgiving, but I was allergic to most if not all of the food. There was no way I was going to ask my friends to re-do all their recipes in order to accommodate little old me!

I was living with my boyfriend at the time, and he too didn’t have an automatic place to go for Thanksgiving, and while he also had invites, he didn’t want to go and leave me at home alone. So I set about developing a set of recipes that would include all the most important parts of a holiday feast, create the feeling of abundance of food, be entirely gluten-free, and be possible for just two people to cook. The amount of food in these recipes is ideal for two people to stuff their faces, and have leftovers for a few days.

Recipe Series for the Holidays

The following recipes are part of a series covering all my favorite dishes for a full Thanksgiving meal, but they could also be used for plenty of other holidays. The full series involves four hubs:

If you can’t afford to go home for the holidays, if home isn’t such a great place for you to be, if you don’t like crowds, or if you have unique food needs that are hard to get around with a table of 10, I hope this recipe series is helpful to you.

Turkey and Stuffing

First comes the question of the turkey. No way was I going to make a whole turkey for just two people! But even turkey breasts are a minimum of 3 lbs and a lot of work. A good friend of mine taught me how to make turkey and stuffing casserole (and gave me his mom’s stuffing recipe as well. Score!).

You simply prepare turkey tenderloins and place them on top of casserole dishes full of stuffing to bake. The recipe below is a great way to still get the stuffing and turkey experience in much less time, with much less work. I, of course, used gluten-free stuffing mix ( I use a local brand called Elegant Elephant) but you can use any stuffing mix you want.

Turkey and Stuffing Casserole

In this recipe series, I teach you how to make a delicious holiday feast for just two people, starting with turkey, stuffing, mashed potatoes, and gravy.
Course Main Course
Cuisine holiday
Prep Time 25 minutes
Cook Time 30 minutes
Total Time 55 minutes
Servings 4 people

Ingredients

  • 1 standard package pre-seasoned stuffing
  • 1/2 C-1 C veggie broth
  • 4+2 tbsp butter
  • 1 small onion chopped
  • 2 stalks of celery chopped
  • C walnuts chopped
  • 4-5 crimini mushrooms chopped
  • 1 egg
  • 2 lbs of turkey tenderloin

Equipment

  • A basting brush
  • 1- 9X13 baking dish or 2 casserole dishes.

Instructions

  1. Preheat the oven to 425 degrees.
  2. Melt the 4tbsp of butter in a large frying pan. Sautee the onions in the butter until clear, then add the celery. Cook until the celery is slightly tender.
  3. In large bowl place ½ C veggie broth and 1 egg. Add the stuffing and mix until moist. You’ll probably need to use your hands.
  4. Add the walnuts, mushrooms, onions, celery, and juices from the pan. Mix together, then add any additional broth needed to make the stuffing relatively wet.
  5. With a paper towel, gently pat the turkey tenderloins dry. Sprinkle both sides with pepper and salt.
  6. Melt the remaining 2 tbsp of butter in a small container, and coat both sides of the turkey generously with it using a basting brush.
  7. Grease the baking dishes, then place stuffing evenly over the bottom and the turkey tenderloins over the top.
  8. Bake uncovered for 30-35 minutes at 425 degrees, or until turkey is lightly golden on top

Easy Delicious Mashed Potatoes and Gravy

Mashed potatoes are a must-have for holidays. They can be a little work intensive but they are worth it. Mashed potatoes can be so delicious, but they can also easily be mediocre. I have a few tips and tricks to keep them extra tasty.

Because our turkey recipe uses just the tenderloins and cooks them over the stuffing, the result is there is no gravy in the pan after baking. To get around this issue, I used pre-made gravy mixes which also saves time and energy. There’s no shame in using a mix, and this gravy works just as well on turkey and stuffing too.

Easy Mashed Potatoes and Gravy

Course Side Dish
Prep Time 15 minutes
Cook Time 30 minutes
Total Time 45 minutes
Servings 4 people

Ingredients

  • 1 1/2 lbs Yukon gold potatoes
  • 1 tbsp milk
  • 1/4 C heavy cream
  • 2 tbsp butter
  • Salt and pepper
  • 2 packets gravy mix

Equipment

  • A potato masher

Instructions

  1. Peel and chop the potatoes into large chunks. The more consistent the sizing of the pieces of potato, the more evenly they will cook, and the more consistent the texture of your final dish will be.
  2. Place the potatoes into a large pot and cover with water. Bring to a boil. Always put the potatoes in before boiling the water, to ensure even cooking.
  3. Once the water is boiling, reduce the heat to a simmer, cover, and cook for 15-20 minutes until a fork slides into the potatoes easily.
  4. Drain the water from the potatoes and then leave them alone so the steam can rise from them for 5-10 minutes. This keeps your potatoes from getting watery.
  5. Warm your cream and butter together until the butter is melted. Once the steam coming from the potatoes has slowed down, add your cream and butter and mash it all together.
  6. Once fairly well mashed, add the milk, salt, and pepper to taste. Make sure not to over mash or the potatoes will turn an unpleasant texture. Take a taste and adjust the amount of milk, salt, or pepper to your liking.
  7. Follow the packet instructions for the gravy, which usually involves whisking the mix into 1 cup of water, bringing the mixture to a boil, and then simmering for several minutes.
  8. Serve and enjoy!

More to Learn, More to Cook

Now, hop on over to Part 2 where you’ll learn how to make Green beans, Roasted Yams, and Cranberry Sauce, and still yet to come, “How to Cook a Feast with Just Two People” which will include additional instruction on how to plan and execute a full holiday feast with just two people cooking, in only two hours!

If you want some suggestions for gluten-free desserts, check out my recipes for Chocolate Chip Cookies and Blackberry Pie:

How to Make Borscht (The Quick Easy Way!)

I once had a boyfriend with a Scandinavian background who he taught me to make borscht. Only, he didn’t follow many of the traditional methods of borscht making, such as cutting the vegetables Julienne style (otherwise known as matchsticks), boiling beef for several hours to create a rich broth, skimming the foam from the top of the broth to keep it clear, or adding vinegar at the end for the distinctive sweet and sour taste.

His reason for his unorthodox style wasn’t a preference of taste, but a lack of patience. He was not interested in carefully chopping a large mound of vegetables into tiny slices, or waiting for the flavors of the broth to deepen. Instead, we haphazardly chopped the veggies into chunky cubes, used pre-made beef broth, and added extra tomatoes to achieve the acidity of the vinegar.

I’ve continued to make the recipe by myself and I’ve tweaked it over the years to suit my own tastes. The result is an easy to make borscht-style stew with a delicious bright red broth, packed full of vegetables and flavor, that’s perfect for a cold winter evening. Don’t skip the sour cream and dill at the end. It really transforms the dish!

This is a, “we’re gonna need a bigger pot,” kind of recipe so make sure to either haul out your extra large pot or halve the amounts below for a smaller portion.

TIP: Beets stain EVERYTHING. Your hands, the counter, and the cutting board will be easy to clean with some dish soap, but avoid using white dishcloths, cloth napkins, or light colored table clothes when cooking and serving this bright red dish.

Quick Easy Borscht

Looking for an easy, less time-consuming method of making borscht while maintaining all of the flavor and nutrients?
Course Soup
Prep Time 30 minutes
Cook Time 20 minutes
Passive 50 minutes
Total Time 1 hour 30 minutes
Servings 10 people

Ingredients

  • ½ lb chuck roast
  • 3 garlic cloves crushed
  • 1 large onion chopped large
  • 3 large carrots chopped large
  • 2 bay leaves
  • 1 tsp Salt
  • ½ tsp pepper
  • 1 tbsp coriander
  • 1 tsp cloves
  • 2 tsp rosemary
  • 1 small cabbage (or ½ a large cabbage) chopped large or small
  • 32 oz beef broth
  • 28 oz canned diced tomatoes
  • 28 oz canned crushed tomatoes
  • 4-5 bouillon cubes chicken or beef
  • 2-3 red potatoes chopped large
  • 4-5 beets red or gold, peeled and chopped large
  • sour cream and dill for serving

Instructions

  1. Chop the chuck roast into small bite-sized cubes. Get your very large pot nice and hot, then add a drizzle of olive oil, the meat, and the crushed garlic cloves to the pot.
  2. Brown the meat for a few minutes. Stir just enough to prevent burning, but you want it to get that darker color. If it’s leaving a brown sticky mess on the bottom of the pot, that means it’s carmelizing, and you’re doing it right.
  3. When the meat is well colored, before things start to burn, take the chunks of meat out of the pot and set them aside. Add your onion. As the water releases from the onion, you can start to scrape the bottom of the pot to get the lovely brown stuff incorporated into your veggies.
  4. Add the carrots, bay leaves, salt, pepper, coriander, cloves, rosemary, and cabbage. Stir to get all the veggies coated in the oil and spice mix.
  5. Allow the veggies to cook for several minutes, as the water releases from them. You’ll know it’s done releasing when the noise of the sizzling increases again.
  6. Add in your carton of beef broth to stop the frying. Add the two cans of tomatoes, the bouillon cubes, and fill one of the cans with hot water and add that as well.
  7. Bring the mixture to a low boil, and add the potatoes and beets. If your vegetables are not completely covered in liquid, add some boiling water or additional beef stock if you have it.
  8. Cover and allow to simmer for 40-60 minutes, until the vegetables prick easily with a fork. Cook for less time if you want your veggies a little crunchier. Add back the chuck roast cubes and stir through. Taste the broth and adjust the seasoning as needed.
  9. Serve with a dollop of sour cream and a sprinkle of fresh or dried dill. Enjoy!

Possible variations to play around with:

  • You can use whatever type of chunky red meat you like, but I find the smoky taste of chuck roast goes really well with the broth.
  • I like to use a mix of red and gold beets, but they will all be stained red once cooked, even if you only use one red beet!
  • Cut the cabbage into whatever size you prefer. I kind of like long floppy leaves of cabbage in my soup, but if you don’t like the texture, it’s easy to cut small.
  • Chop your veggies to be whatever size is easiest for you to fit in your mouth!

If you want to Instagram your beautiful dish, make sure to do so before you stir in the sour cream, as the white and the red mix together to make bright pink! Boy did I get some strange looks in the break room at work with my pink soup.

I hope you enjoy this quicker version of Borscht. If you try any cool variations of my recipe, please let me know in the comments!